WordPress is arguably the widely used CMS platforms across the internet. It powers simple blogs to complex shopping platforms. Thanks to its active online community & hundreds of thousand of plugins, themes & extensions. In this guide we will talk about how to install WordPress using Softaculous Auto Installer.
Softaculous is a commercial script library that automates the installation of commercial and open source web applications to a website.
If you have a hosting account at Shujaa Host, chances are you have already come across Softaculous in your control panel.
How to install WordPress using Softaculous Auto Installer.
- First, you start by logging into your control panel. So log into your control panel if you’re not logged in yet.
- In your control panel, scroll down to Extra Features section then click on Softaculout Auto Installer.
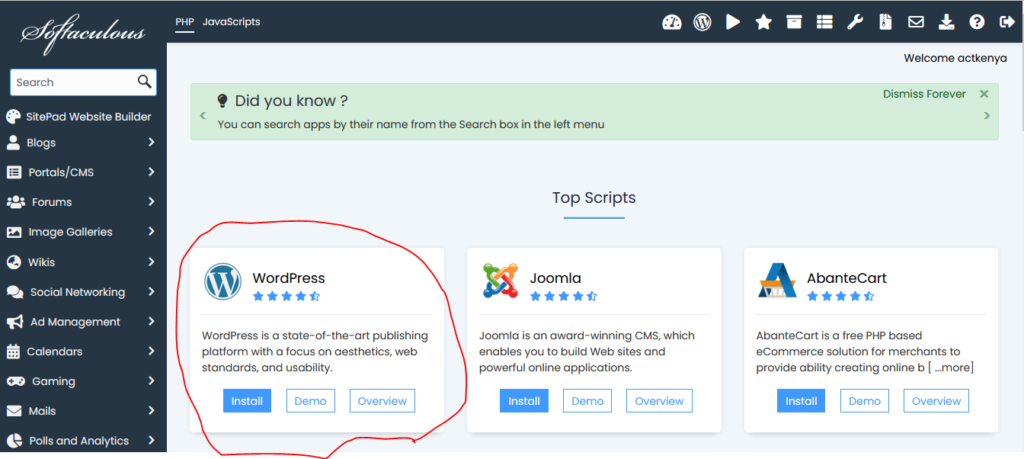
- On the next page, locate WordPress and click on Install button under it.
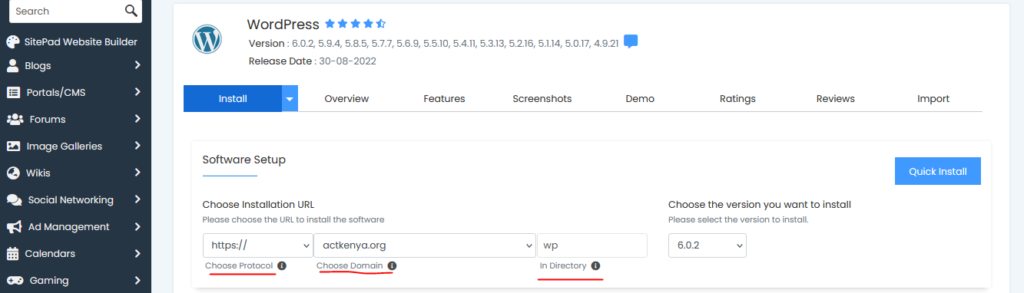
- On the next page, under “Choose Installation URL”, set “Choose Protocol” to https.
- In the Choose Domain field, select your domain or subdomain that you want to use.
- In the In Directory Field, delete the default value and leave it empty. The default value is set to wp. Only enter a value in this field if you intend to install your WordPress in a sub-directory.
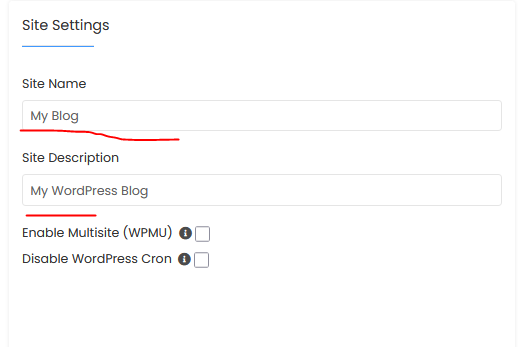
- Scroll down to Site Settings section. Type your Site Name & Site Description. You can always change this information after the installation is complete.
- Under Admin Account section, fill in your preferred WordPress Admin Username, Password & Email address.
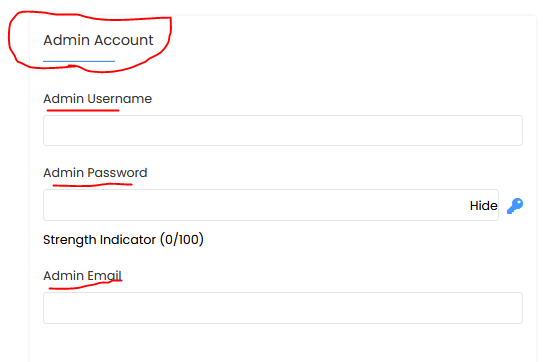
Security Tip:
Always replace the default username with your own & type a strong password. A strong password should at least be 8 characters long, contain both uppercase & lowercase letters, numbers & special characters.
Also make sure to replace the default email address that is prefilled. Use your email address. This becomes handy when you’ve lost your password.